Brakes are important.


Enough money for 17 " rims ,tires,Brembo.


Spareparts.Get some new parts first. CHECH diameter of piston ,Caliper reneval kits INCLUDING new calipers , bolts sliding pins,pads brakefluid ,paint. LOCTITE
EBC brake pads green stuff 164.1

Caliper reneval kit for 54 mm piston , some cars have 57 mm pistons.
This is where you find the number (164.26 )
This is where you find the number (164.26 )
164.2


Tools 19 mm socket , breaker bar.
Jack ,stands.
Ringspanner 13 mm and 15 mm.
Steel brush.
Gloves,protective glasses.
Sledgehammer well you newer know.
Loosen wheelbolts , Jack up car ,APPLY EMERGENCY BREAKE Gear in drive remove bolts , remove wheel ,turn steering wheel so brakecaliper comes more out of wheelarch.
You never know when 400 Nm is not enough to loosen a bolt buy a long breaker bar 164.3

That bolt is not good , it came of way too easy and the threads are missing
I have to replace the hub too hence the missing hubnut
Torque 95 - 105 Nm. 164.4

There should have been a rotor retaining bolt or dolly
Torque 6 - 13 Nm.,
164.5

Caliper securing bolt 13 mm head and sliding pin 15 mm head
164.6

Prize the caliper from the pads ,remove ABS wire from brakeline, brakeline from bracket . Pad wear indicator wire off.
164.7 ABS wire off 164.8


Secure the caliper to the strut spring Sliding pins really stuck ! I didnt se that one coming.
Bracket off 19 mm socket breaker bar , if the wheel has been turned , brakeparts out there is room for the long breakerbar.
164.9 Bracet off 19 mm socket 164.10 Torque 52 - 58 Nm.


Sliding pin boot of , WD40 and a lot of force to pull it off that is not normal careful with the thin groove for the rubber boot
164.11

Clean them , including the threads for the bolts ,this is where loctite will hold the caliper bolts in place when you brake a 4000 pound car from 100 mph to stop in 100 feet.

Sliding pins CLEAN 164.12 Cleaning tools


Inspect the bracet where brake pads are in contact with them, you will notice that cleaning them is more easy when the bracet is off the car .Roting wirebrush is awesome, use protective glasses.
164.13

164.14

This is important, the pads have to be able to slide . Remove all rust , consider how long it will take to become rusty again and then decide to paint the bracket properly.
Closeup outer side of bracket 164.13

Bracket inner side 164.14

Degrease ,degrease again do it outside , or your lungs might fall out of your body . Bracket holes filled with something , you dont want paint on the threads remove the something while paint is still wet. 164.15 Final heat resistant paint 164.16


Dry harden paint.
Continue on caliper, press brake pedal to unleash the Kraken piston.
164.17

So far the piston looks fairly good. There is dust and dirt under the dustboot its supposed to be on the outside only
Someone painted the caliper withe the boot on.
17 mm ringspanner onto hose nut
164.18


 Bracket close up after removal of fixed line use WD 40 surprice , and a screwdriver.
164.20

164.21 Bracket and fixed hose
cleaned degreased.
164.22 Painted


You can still scource these lines from e bay , Canada
BRAKE CALIPER GIRLING 54 MM PISTON SAVE YOUSELF SOME TROUBLE AND PRES THE PISTON OUT USING THE BRAKEPEDAL WHILE THE HOSE IS STILL ON.

164.23

Piston and dustboot of inner seal in place ,
clean with circular movements
164.24
Clean, use a microfiber cloth with a rough surface CLEAN GROOVES for caliper seal and dust boot properly, Clean inlet and vent for brakefluid, clean threads. Blow dust away.
164.25

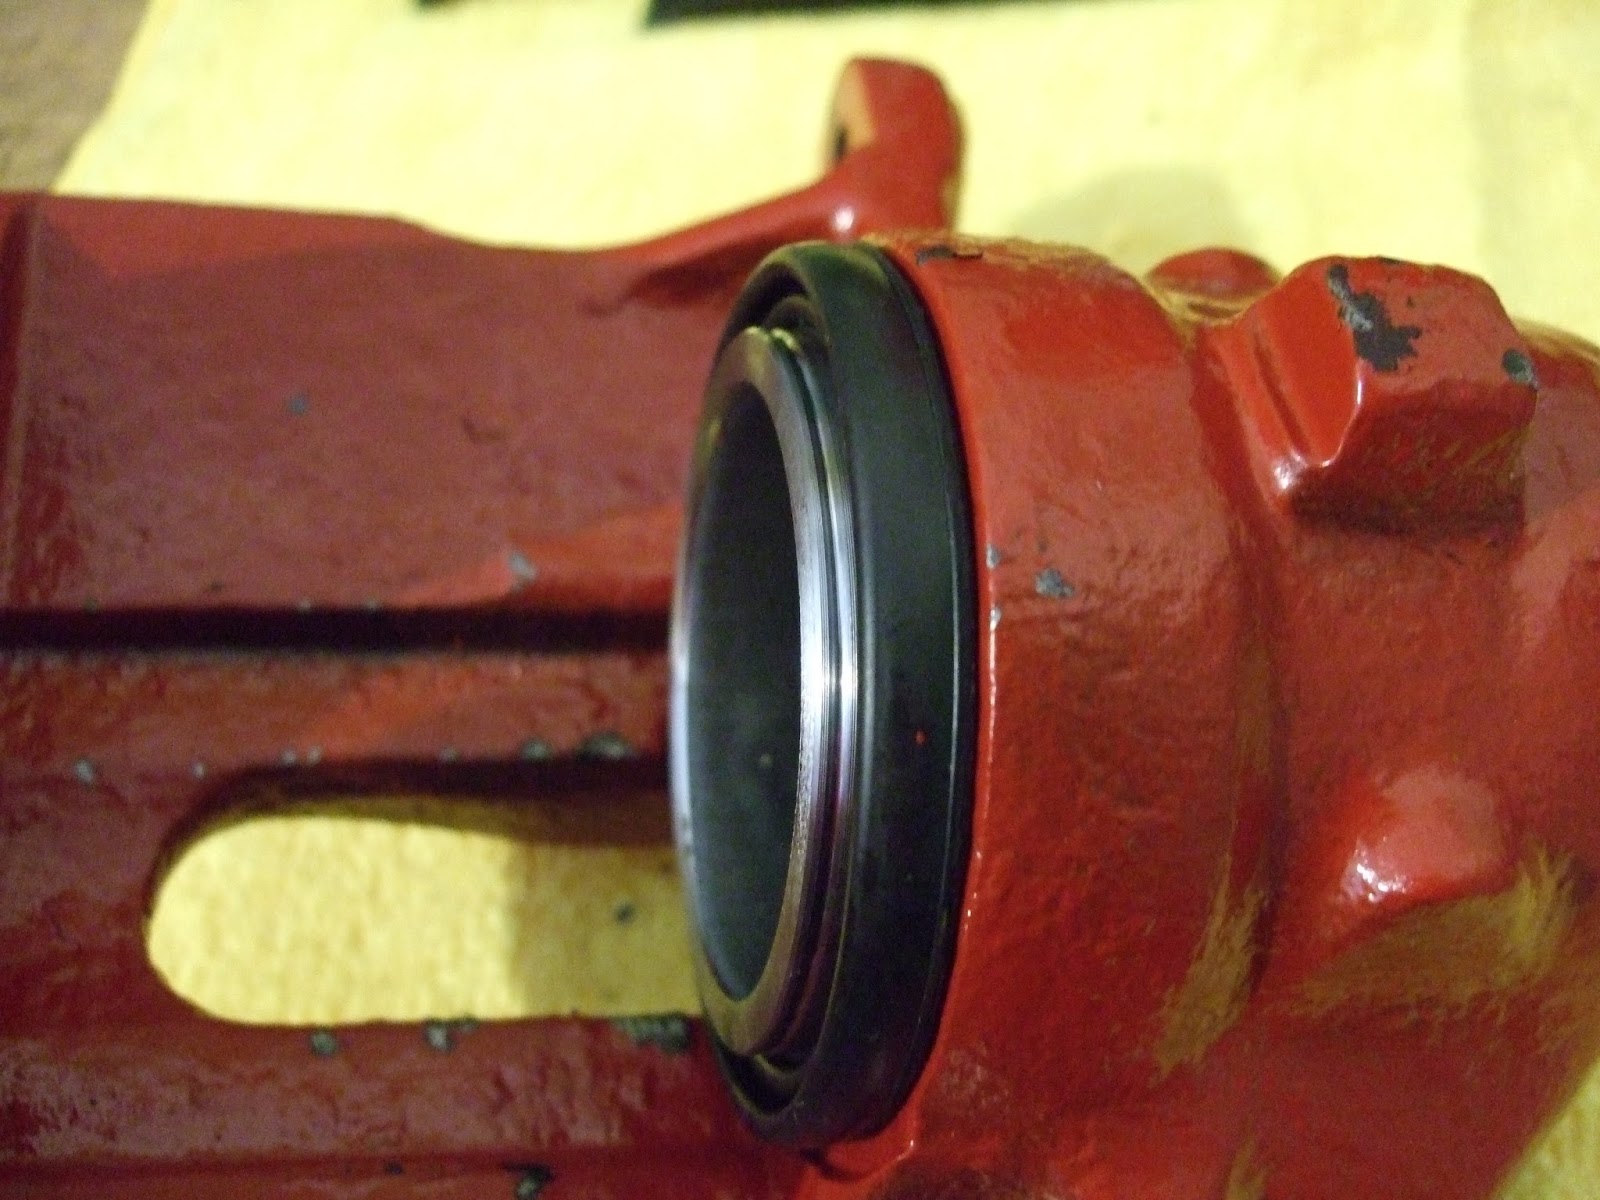
It actually says the piston diameter on the CLEAN caliper 164.26

Papertowel into all holes with threads and the piston chamber ,
Degrease paint heat resistant primer and the topcoat , here red.
remove papertowel while paint is wet or it gets stuck.
Brake caliper and bracket in the paintbox 164.27

Dry harden clean grooves add new bleeder valves .The old one was stuck surprice....and did not look good after a mole grip had to be used. M 8 x 1,25 M means metric , 8 means 8 mm diameter and 1.25 refers to the type of threads that fits this thread gauge
164.28


Old bleeder valve will not fullfill its purpose
of easy fit tightning and letting air out wheen needed
Torque 4 - 6 Nm. 164.29

Its time time to put it back, all of it .
164.30

164.31


Dustboot into the groove too, make shure using your fingertip that it is in the groove all the way around.
164.33 Dust boot. 164.34 lubricant


NO sharp instruments , these are for bikes , plastic 164.35

Squeeeeese be shure that piston is centered and doesent tilt
164.36

All the way in . 164.36
Pipe in 11 mm ringspanner
Torque 8 - 10 Nm 164.37 Bracket for flexible hose on 10 mm 164.38


Sliding pins with new boots and calipergrease renew that grease every time you fix the brakes
164.39

Enjoy this is going to work properly.

164.40 164.41

164.42

Torque 8 - 10 Nm 164.43

164.44

New sliding bolts on E - bay just too tempting.
LOCTITE ON THE TREADS 164.45

Detail of the bolt securing the caliper to the bracket, thats where the loctite has to be.
That means, when you reuse the old bolts you have to clean and degrease them and then apply loctite.
Note the orientation of the rubber boot smallest opening towards head of bolt.Large opening towards the bracket.
Torque 31 - 38 Nm. 164.46

Time to disconnect the flexible hose Brush , clean,WD 40 , pull the clip that secures the hose assembly plus 11 and 17 mm ringspanner
164.47

Push the rigid line down through the bracket it gives you enough space for the tools
Torque 8 - 10 Nm. 164.48

A plastic valvecap fits perfectly , just push it on , it doesnt have to stay on the threads 164.49

The ABS connectors are shot , solution buy some 2 pinn weather proof connectors.
164.50

164.51
Tools needed.


Put the silicon seal onto the wire , then crimp the pin to the wire follow the instructions
164.53

Pin and wire insulation is supposed to end up circular in shape use whatever tool gentley small steps , I ended up using the crimp tool , that you are not supposed to use for this step.
164.54

Once the pins lock into the connector they really stay there !!!
164.55

164.56

Brake assembly onto hub assembly , here out of the car. Left side of the car
164.57

Detail , lubricate here.
164.58


There 164.59.
Where brakepad and bracket touch.
164.60

More lovely pivtures
164.61

ABS toothed ring detail
164.62

Detail ABS wire in the brackets and UNDER the rigid brakeline

Hope to change the ABS sensor , well , rust in an iron cavity makes it smaller ......soooooooh.
Buy a new sensor before you try that , if you are lucky someone did actually grease that sensor part the last time they too it apart, chances are they did not. 164.64

Remove abs sensor cable bracket , allen key , Turn hub ,tab very gently , perhaps a small socket instead.IF greased , it comes out intact.
ABS sensor , bracket164.65

Closer look , no it not supposed to look like this 164.66

Thats why rust ( surpirced ...) 164.67

164.68

Clean the threads for the allenbolt. Greese.
New ABS sensor 164.69

Perfetto from Italy , ebay 164.70

William Lutken.
This looks nice too.
Waiting for Brembo Max Lott autoteile failed to box them right so they were lost , Carondo did exactly the same mistake . Now third attempt to get some Brembo Max.
I´ll be back.
Ingen kommentarer:
Send en kommentar