onsdag den 23. september 2015

Alfa Romeo 164 hub and bearing front


AR 164 3,0 V6 1991 ABS.
Hub , bearing and ABS connector.

The holy grail a hydraulic press 12 tons .


"You never know when you need an iron pipe Terkel !"


A very sweet danish cartoon , here in italian of course.

På dansk.


Well its really not funny when you pull a wheelbolt of and the threads are shot and the next too you really want the wheels to stay on the car.


Shocking bad bolts to the left , new on the right

                                                                                                                                              164.1


You are going to need espresso and some spare parts.
Hubs ,bearing aksel nut.
164.2


Hub nice clean threads

                                                   164.3


Get them, sooner or later you are gonna need them ...
Torque 356 - 400 Nm.
164.4


Thats whats missing in the old one


 THREADS. 164.5                                                                      


YTools 3/4 " breaker bar 36 mm socket,waterpipe sliding hammer.
 "You never know when you need an iron pipe Terkel !"ou might have to reduce outer diameter.
164.6                                                                                               Extension 164.7


Patience a lot it has to be done with the wheel on the car and the weight of it on the ground.
164.8 center cap of


Chisel , screwdriver along the groove in the driveshaft 
164.9


Its a lot of gravity you need on a very long ( extended ) breakerbar.Emergency brakes on ,neutral gear you really do not want to risk timingbelt slip
Torque 356 - 400 Nm.                                                      164.10


Well that one was easy.
Hubnut close up pretty beat up.                                                                                                      164.11


Plan B what if the nut is ruined , drillbit,oil , try two places
1 At the broad base of the nut just close to the groove in the shaft
2 Along the groove in the driveshaft

 5,5 mm drillbit                                                                                                                164.12
          
                                                                   
A chisel and a hammer.Here a very nice 16 mm wide chisel
Split the bolt. Along the groove.
                                                                                                                                 164.13

Right there two holes one along the groove , yes it looks messy try to chisel and hammer it anticlockwise. Then put your socket back on and it will come of.
164.14


164.15

 hubnut back

164.16


Now back to business, hub of using wheelbolts and a sliding hammer or remove the whole unit and use a hydraulic press.


Sliding hammer in position using wheelbolts to fix it to the hub pull the hammer many many many times .
And then some .
IT is eventually going to get off.    It really is !                                  


Yeeeeeeeehaaaaaaaaaaah , hub off.                                                                   164.12

The bearing is next step , you have to get the whole unit off.

Bearings Mapco to the left , including retainer ring and hub nut.  Alfa Part to the right , dissapointing

164.13
 I just think I will recommend this , comes with all you need.
                                                                                                                                                        164.14

Strut off you can choose to remove the entire unit , starting at the top , mark the bracket position through the hole.
                                                                                                                                                        164.15

Looosen all 4 bolts , breaker bar , need more space , turn the unit out from the wheelarch.
                                                                                                           164.16


Tie rod end , nut loosen , try hammering ,CAREFUL 
                                                                                                                                164.17

ABS sensor you really dont want to break the ABS sensor.
That one                                                                                                                    164.18

Try this it works, apply pressure and the a whack with the hammer                                            164.19

The play in this is way too much                                                                          
ABS wire , weel its at the inner wing , behind the inner plastic lining and that is behind the brake hose bracket , got it .
The bracket is of course welded to the inner body work.........

                            Disconnect the clamp securing the brake hoses to the bracket , just pull towards yourself                                                                                                                           164.20


push the assembly down , 11 mm and 17 mm ringspanner will just fit inside the bracket,
                                                                                                                                                        164.21


Use a cap that fits , here a valve cap. Then push the brakeline up and out of the bracket.

Undo several completely wasted screws with a screwdriver , Phillips 2 or give up and cut them with your new seconbest friend a Dremel and a cutting disc.
                                                                                                                               164.22

Gentely pull and rotate forwards and the inner plastic will come of,
                                                                                                                                                     164.23


ABS wire through inner wing you could try to remove from hub , but you better have a new one ready, its stuck due to rust
                                                                                                                                                        164.24


Pull ABS connection here and slide it down , mine is to bad to be shown.
                                                                                                                                                       164.25

             OK OK , This really isnt funny , its impossible to scource and its important , Ill have to find a high quality weather proof two pin replavement of some sort.                          
                                                                                                                                 164.26
                                                                                                             

Back to the mechanical parts this has too much play in it                                                                          164.27

Lower ball joint same procedure .      Or loosen the three bolts at the base                                                                                                                                                                                                      164.28


This works buy that tool
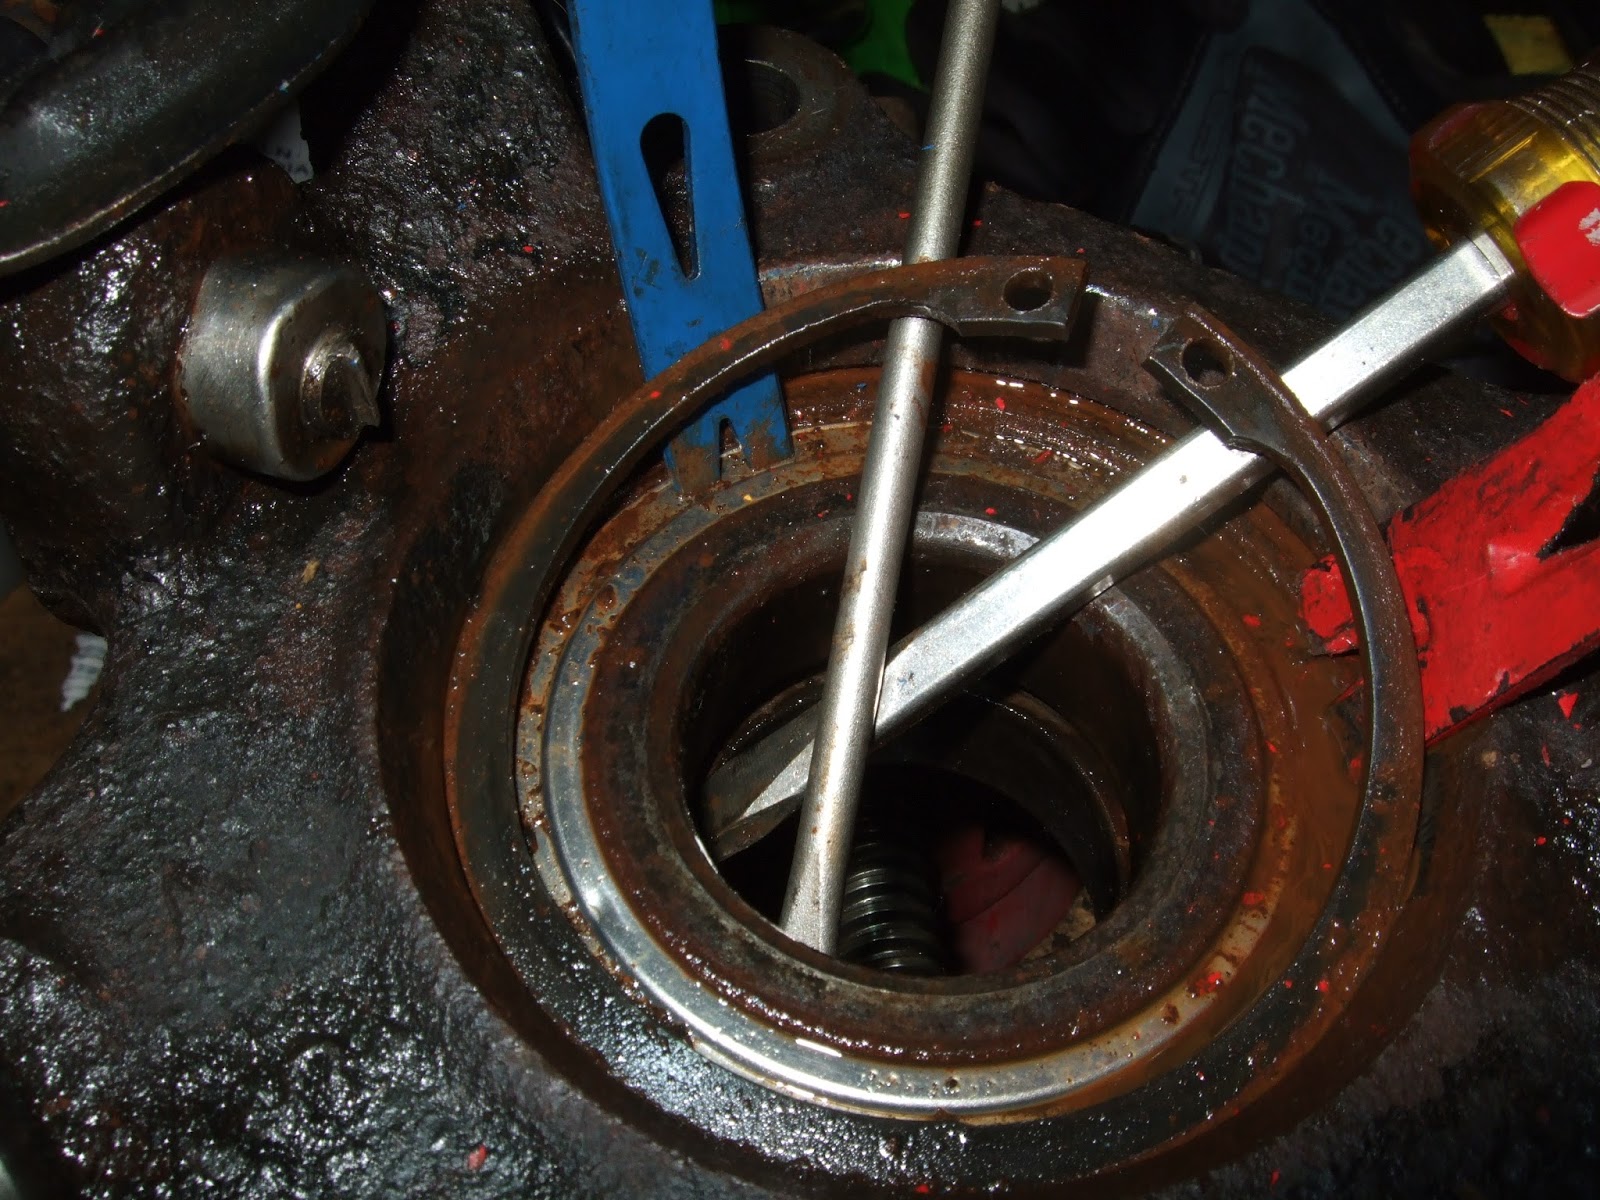
Clean the C lock ring , WD 40 spray and pray.                                                                            164.29

Well I thought I had a tool for compressing that C ring , but it didnt work.
If you have a new one , try this.
It will drive you mad , but again patience .                                                                                    164.30

Again clean .
 If you are loking for the rigt press tool it's Ø 72 mm in diameter.
                                                                                                                                                        164.31


                                                                    Actully the hammer suceeded in the quest of loosening the bearing from the unit , used the press for the rest.   NOTE THE ORIENTATION OF THE UNIT OUTSIDE UP. PRESSING THE BEARING OUT ON THE INSIDE.                                                                                                                                                                                                                                                                                                                                                                                                       164.32

Orientation is important , Water reservoir underneath Hagia Sophia Istanbul


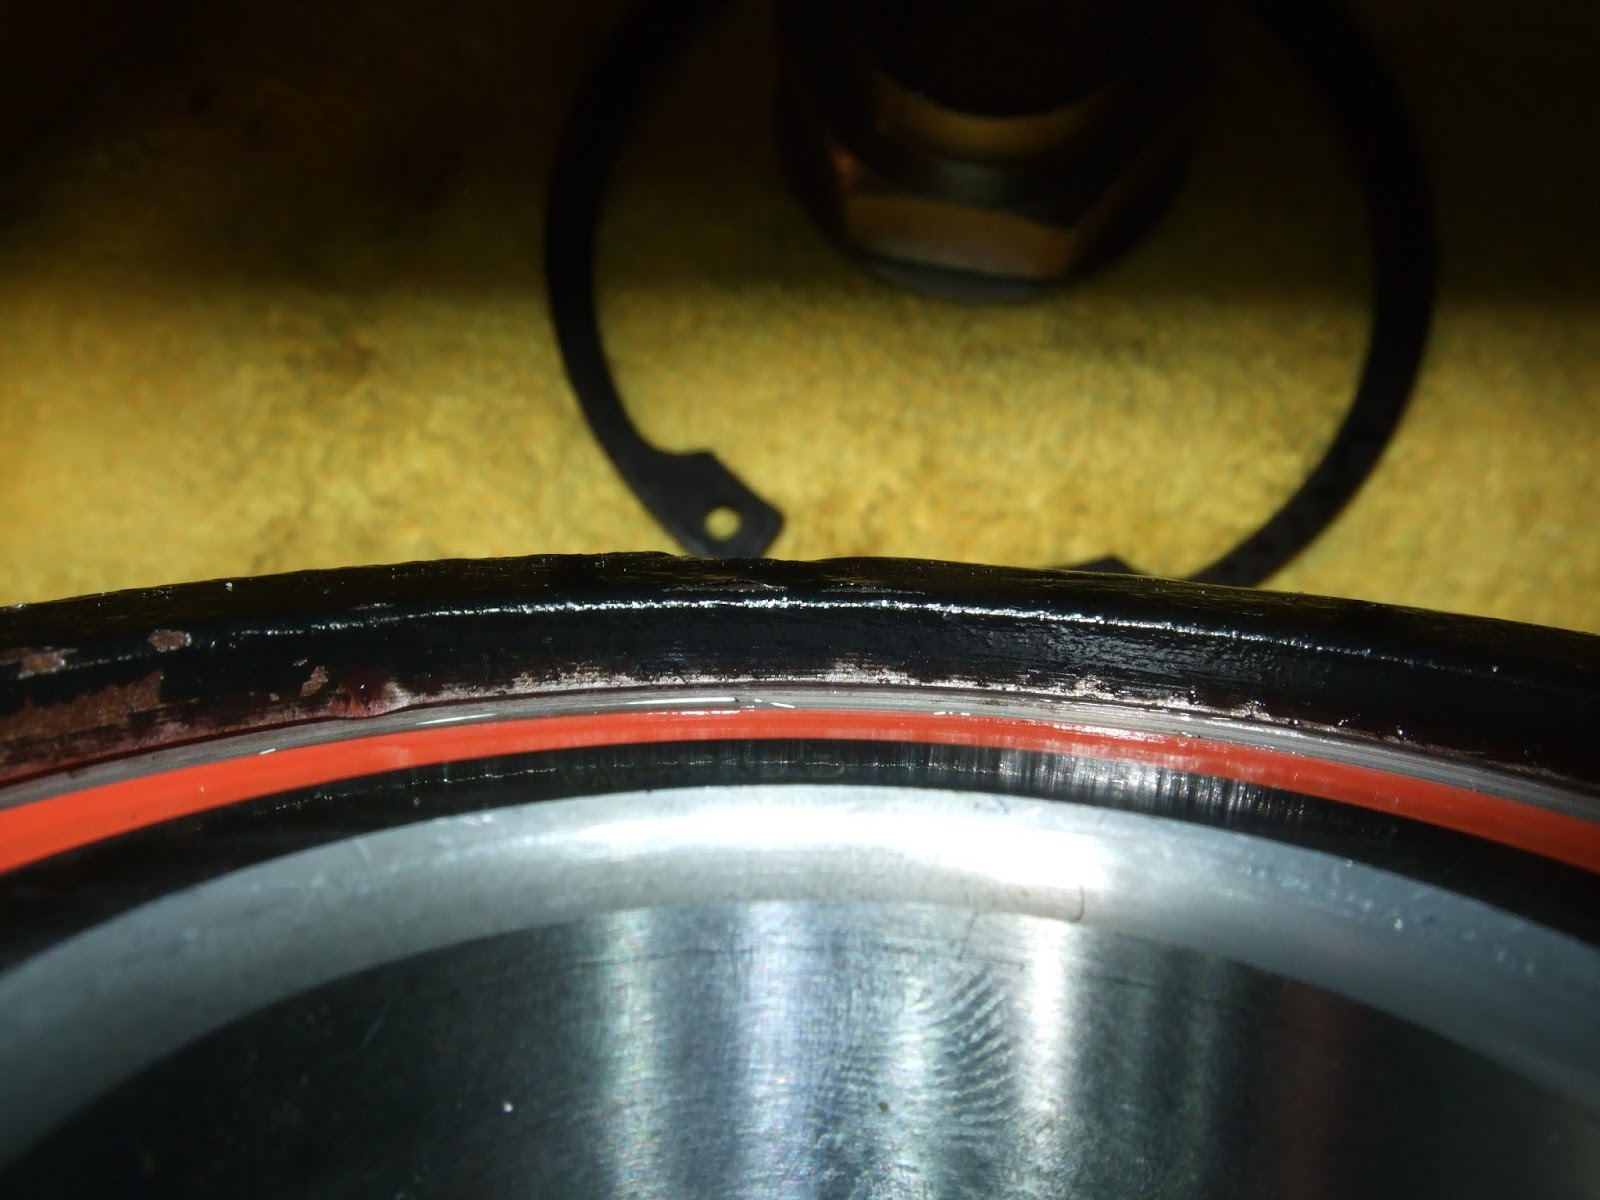
INNNER SIDE OF THE UNIT NOTE THE 2 MM LIP.        
                                                                                                                                                        164.33

The remaining stuff is just cleaning greasing squeasing.

Clean the inside.
Take care of the retaining ring groove , a screwdriver or similar.
                                                                                                                                 164.34


And whatever is not shiny , remowe it. Sanding sheet , note the lip from the inside , clean it.
                                                                                                                                                       164.35


You can paint it or not, my paintbox was kind of thirsty for more.
                                                                                                                                                        164.36

Time to cool a bit , have an ice cream , Sicilian.

If you paint , stop at the bearing , paint there will not allow you to press the bearing into place 164.37
                                                                Pertty neat                                                                       164.38

ABS CONNECTOR

Except for the ABS connection .                                                                                                   164.39


Theese might do the job                                                                                                                164.40

Not funny but this has to work.
                                                                                                                                                       164.41


There is nothing left from the body of the connector cut the cable.
PUT the weather seal on and then the pin
                                                                                                                                                        164.42

The part onto the insulation has to be circular , that provides the best seal for the silicone seal that has to be slided onto that.
                                                                                                                                  164.43

Neat, pins locked inside the body of the connector remember the orientation when you do the female part of this connection
                                                                                                                                                        164.44
Locked and ready
                                                                                                                                                        164.45

HUB ASSEMBLY

Apply grease just a thin layer , align
                                                                                                                                                  164.46


It´s time to some preassure ,center and be shure that all the items are horisontal.

                                                                                                                                                      164.47


There has to be room for the retaining lock ring in the groove                                                                                      
                                                                                                                                                   164.48
I missed this dent.


Time for a ring, pliers of a good quality is necessery.Try a screwdriver to press it all the way in along whith the pliers
                                                                                                                                                     164.49


The hub , its a long piece so it tilts more easily
                                                                                                                   164.50


 align and realign SUPPORT THE BEARING UNDERNEATH OR THE INNER RACE WILL POP OUT
The old bearing suits this supporting task very well , on top somesthing small enough to pas the lockring and support the bearing                                                                                                164.51

                             Nicely aligned                                                                                             164.52


Finally things are back to normal , Close up of inner side , inner race too.
                                                                                                                                                      164.53

Outer hub assembly ready for the car
                                                                                                                                                        164.54


I´ll be back.
'
William Lutken


Ingen kommentarer:

Send en kommentar