torsdag den 19. november 2015

Alfa Romeo 164 S steering.

Salt rust. Westcoast of Sicily


Inspection , start with that. Turn the wheel outwards and inspect from the front of the car.
Here lower right balljoint dustboot torn apart.In that case you just need new ones.
If dustboot intact , investigate further if  too much play is present, Jack up the car.Turn wheel out.
Use a crowbar to look for ekcessive play in the joint.

                                                                    Torque 50 - 60 Nm.             164.1


Change them in pair chances are ,they are both worn.
                                                                                                                                   164.2

Make shure they come with new nuts and bolts , these nuts are the locking type , the three at the base are slightly oval in shape Torque 21 - 24 Nm., the big one at the topTorque 50 - 60 Nm.  has a nylon lock thread.
                                                                                                                                                         164.3


Be careful , the ABS sensor is just beneth the nut , 17 mm socket or ringspanner loosen but do not remove the nut , try a hammer , didnt work for me again...including hammering on the arm.


Sorry brute force isnt aleays the solution


Do one side at the time.
Tie rod end , same rules inspect rubber dust boots , investigate for play , wheel jacked up grab wheel at 3 and 9 and move it side to side wheel shuld not move  any without tie rod end moving too.
Crowbar too . Sorry the brakepad indicator wire has been cut by previous owner. Bad move.

                                                                                                                                 164.4


Buy two then you have to do only one wheelalignment


Yes its fun too, you know it, because you have to refill the reservoir servo and clutch.
164.5

Steering rack , loosing fluid damned !

Look under the front of the car
164.6


Inspect steering rack , here the left side.Looks like a leak to me.
                                                                                                        164.7

Siena before the horse race , water to avoid dustclouds in the temporar stabel

The S model has a special steering rack damned I nee to scource that too.

Steering rack get that thing of my car.

To get theese of your steering rack is not funny.

The key to succes is a long enough extension for your socket AND a long socket too.
                                                                                                                                                    164.8


Yes that long
                       164.9                                                                                   Looooong 13 mm      164.10


 Steering wheel side of car , S model , manual gearbox hoses of

 Empty the fluid resorvoir ,undo the clamp have a new stainless ready , it really looks shitty to have rust flow from the clamp
                                                                                                                                                    164.11


Simply pull it upwards , that will now allov you to put a ringspanner 19 mm or a socket onto the bolt head of the pressurehose                                                                                                            164.12


Undo pressurehose , tip copper gasket under the bolt allows for thightening if its stuck , then the gasket will be compressed and do the loosening more easy.
164.13


Socket option and breaker bar it's usally stuck.

Torque 45 - 50 Nm
                                                                                                                                                       164.14

Heat shield Bracket bolts 


Leave a torch down there and look for the light from above in the engine room,long 13 mm socket

                                                                                                                                                     164.15

There 
164.16


Now follow the light
164.17


And yes its the kind of bolts used for exhaust , a breaker bar might be needed
164.18


Repeat other side , same approach
and you will be able to undo the bloody bracket nuts too
                                                                                                                                                 164.19

Remove the heat shield and find your 17 mm long socket and breaker bar here too , theres locktite and rust on the threads
                                                   Driver or pinion side front of bracket  164.20


Passenger side , assemble the socekt parts from here , wriggle the socket in place from above , make shure its all the way down over the nut , here its not !
                                                                                                                               164.21


Breaker bar and wd 40.
                                                                                                                                                       164.22

STEERING COLLUM DISCONNECTED.

Its time to disconnect the steering wheel from the rack and pinion.
Carpet pull it from the cover to the steering collum
                                                                                                                                               164.23

10 mm long socket three nuts
                                                                                                                                              164.24


Pull outer plastic and foam cover up
You might have to undo the speeder , someone had made a cut in my cover...
                                                                                                                                              164.25


Remove bolt 13 mm socket , turn steering wheel into a position that gives you enough akcess
                                                                                                                                             164.26


loosen 13 mm special bolt long socket again , "open" the clamp , with a chisel and use crowfoot or whatever you have , its a real pain !

Remove second metal cover , if your'e lucky the bolts on the onther side will stay welded onto the chassis....the very last one was not , try this  a 13 mm ringspanner on the nut a gripwise onto the threads , so the ringspanner stays on , get to the outer bolt ,when you have room behind the steering rack
                                                                                                                                                       164.27


BRACKET BOLTS THE 4 

Might have to remove the air intake hose to get to those
                                                                                                                                                     164.28


                                                                         THEM 164.28

Well same procedure as the other bolts 17 mm long socket , breaker bar
                                                                                                                                                    164.29


Remove the alloy support base from the underside of the rack assembly , at the pinion by lifting the rack assembly up there is a recess in the subframe for both of them , but only this is removable from the steering rack
pull it out.
                                                                                                                                164.30


That vill give you the wiggle room to free the pinion from the hole in the chassis and enable you to pull the rack assembly out , here the left side of the car.
                                                                                                                                                      164.31


Well that was very entertaning .
                                                                                                                                                      164.32

Now in order for this to work , you might consider to adjust the position of the tie rod ends to fit your car prior to reasembly , the hose to the reservoir might need a replacement along with some stainless steel clamps.
                                                                                                                                                       164.33

Clean your bolts the threads need to get a proper cleaning.
Source new nuts.164.34
If you havent used a thredcutter before , these bolts are not the ones to start with !
164.34
due to the two recesses at the tip of the bolt , you have to do this by hand , very very carefully
164.35


164.36

If any of theese bolts are beyond repair you can still source them.


Alternatively the rear ones not supporting the heat shield can be replaced with M 10 X 50mm thread 1,25

clean and paint if you wish.
164.37

Replacing hoses to the reservoir 10 mm bolts for reservoir bracket
                                                                                                                            164.38

Undo the hoses down deep in the engine compartment where the hoses end , do not try to get them of the reservoir directly for now using a molegrip  if the original clamps are still on , adjust the closing distance for the grip so you do not ruin the clamp.

   This is the adjusted max closure of the mole grip 164.39

connection to cooling pipe here,connection to servopump follow the hose , there should be a connection this is the adjusted max closure of the mole grip
                                                                              164.40

Gently pull the reservoir and hoses up , there should be a rubber gasket or seal you can price it of the chassis
164.41
The big hose with the shiny connection at the end is Ø 16 mm or 5/8 " thats the one to the pump.


                                                                                                                                                     164.42


You might need to scource a 5/8 , 15,9 mm hose that can handle oil
                                                                                                                                                        164.43
The old hose to the right is looking for retirement clean parts undo the remaining part to the servo pump , chance is it worn too.


Right side of car : Servo pump right inner plastic wheelarc protection of undo two 10 mm bolts for the timing belt tensioner cover.
                                                                                                                                                       164.44
 Then a 24 mm ringspanner

Banjobolt and TWO copper gaskets of.

Torque 50 - 55 Nm
                                                                                                                                                       164.45
Clean replace
                                                                                                                                                      164.46
Note the mole grip , when closed and locked the jaws leave enough gap in order to not break the clamp ends                                                                                                                                     164.47

Correct position of clamps
164.48

Remember the overflow thin line from the cap.
If a new reservoir needs to be fitted , buy the BMW its very very alike. Same hose diameter.
BMW to the left save the overflow line for the cap


Align brackets and threads
164.49

do the difficult one first
                                                                                                                                                       164.50

Return hose : copper gaskets ( TWO ) for the banjo bolts can be sourced from Pelikan car parts.
Ø 18 mm ( Inner Diameter , ID ) Outer Diameter ( OD ) 23 mm Thickness 1,5 mm
                                                                                                                                                       164.51

High pressure banjo bolt at steering rack : Ø 14 mm ( ID ) x 20 mm ( OD ) Thickness 1,5 mm
                                                                                                                                                       164.52
Finally , found a hose refurbish center in Indianapolis
                                                                                                                                                       164.53
Cleaned ,painted remember to pour servofluid through before reassembly there might be a lot of debris in hose and joints,outer sleeve on , in case of leaking hose high pressure hose , fluid is diverted away from hot exhaust
                                                                                                          164.54


Servo rack , before installation , check numer of turns to stop in each direction and since this is a S model , check for resistance against spring in rack
                                                                                                                            164.55


Molegrip on 164.56

Here a cake lid onto the housing , so lid doesent turn
                                                                                                                                           164.57


Mark points of resistance
164.58

Realign , here a plant thingy marker
                                                                                                                                              164.59


Find and mark middle distance , a soft measuring tape might come in handy    

Remove tool and disc , mark aksel in several places                                 164.60


Mark aksel up here too , might come in handy when the other parts come on            164.61

If the old steering rack was correctly adjusted , measure diastace to tie rod ends and adjust new one

Apply grease onto threads.

Apply silicone grease to shaft allowing for axels to turn without twisting the rubber bellows


Make shure parts fit prior to installation


Put the steering rack in turn this towards gearbox to avoid brake booster , in and then back.
Red aksel mark visible pointing at dead center.


SERVOPUMP.

Servo pump right inner plastic wheelarc protection of
                                                                                                        164.62

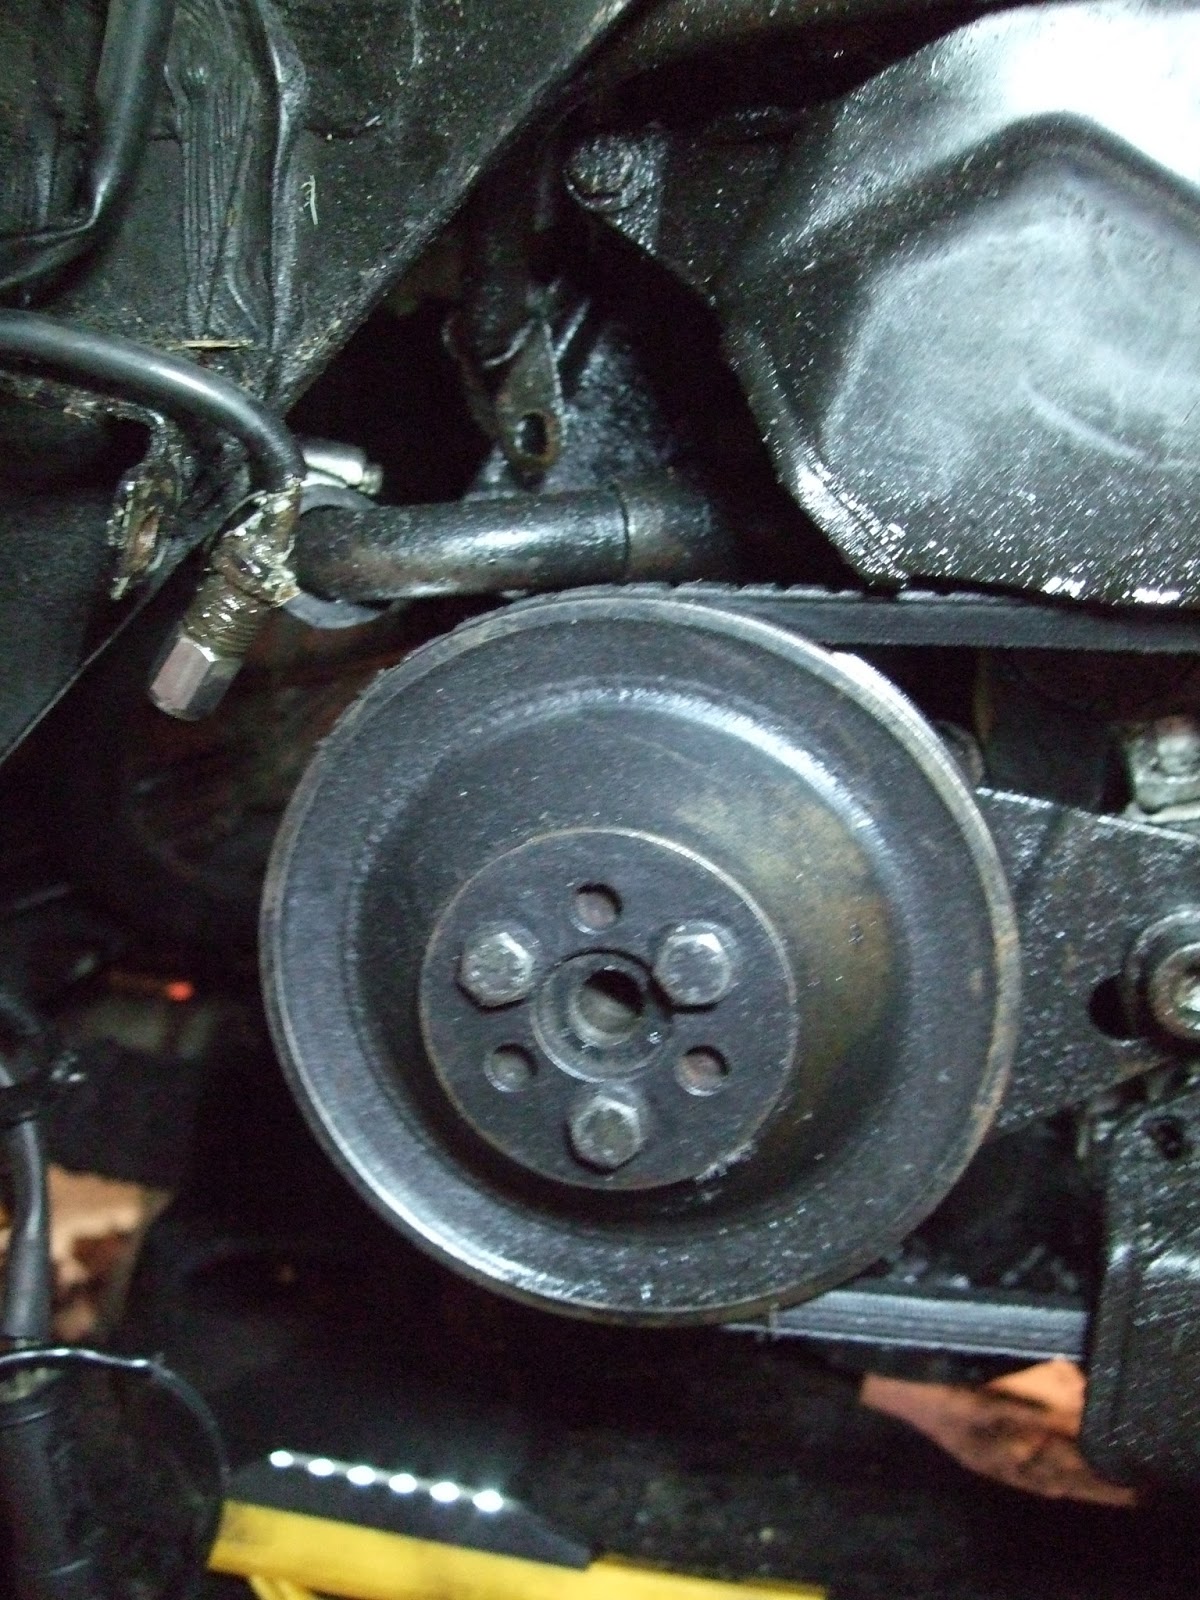
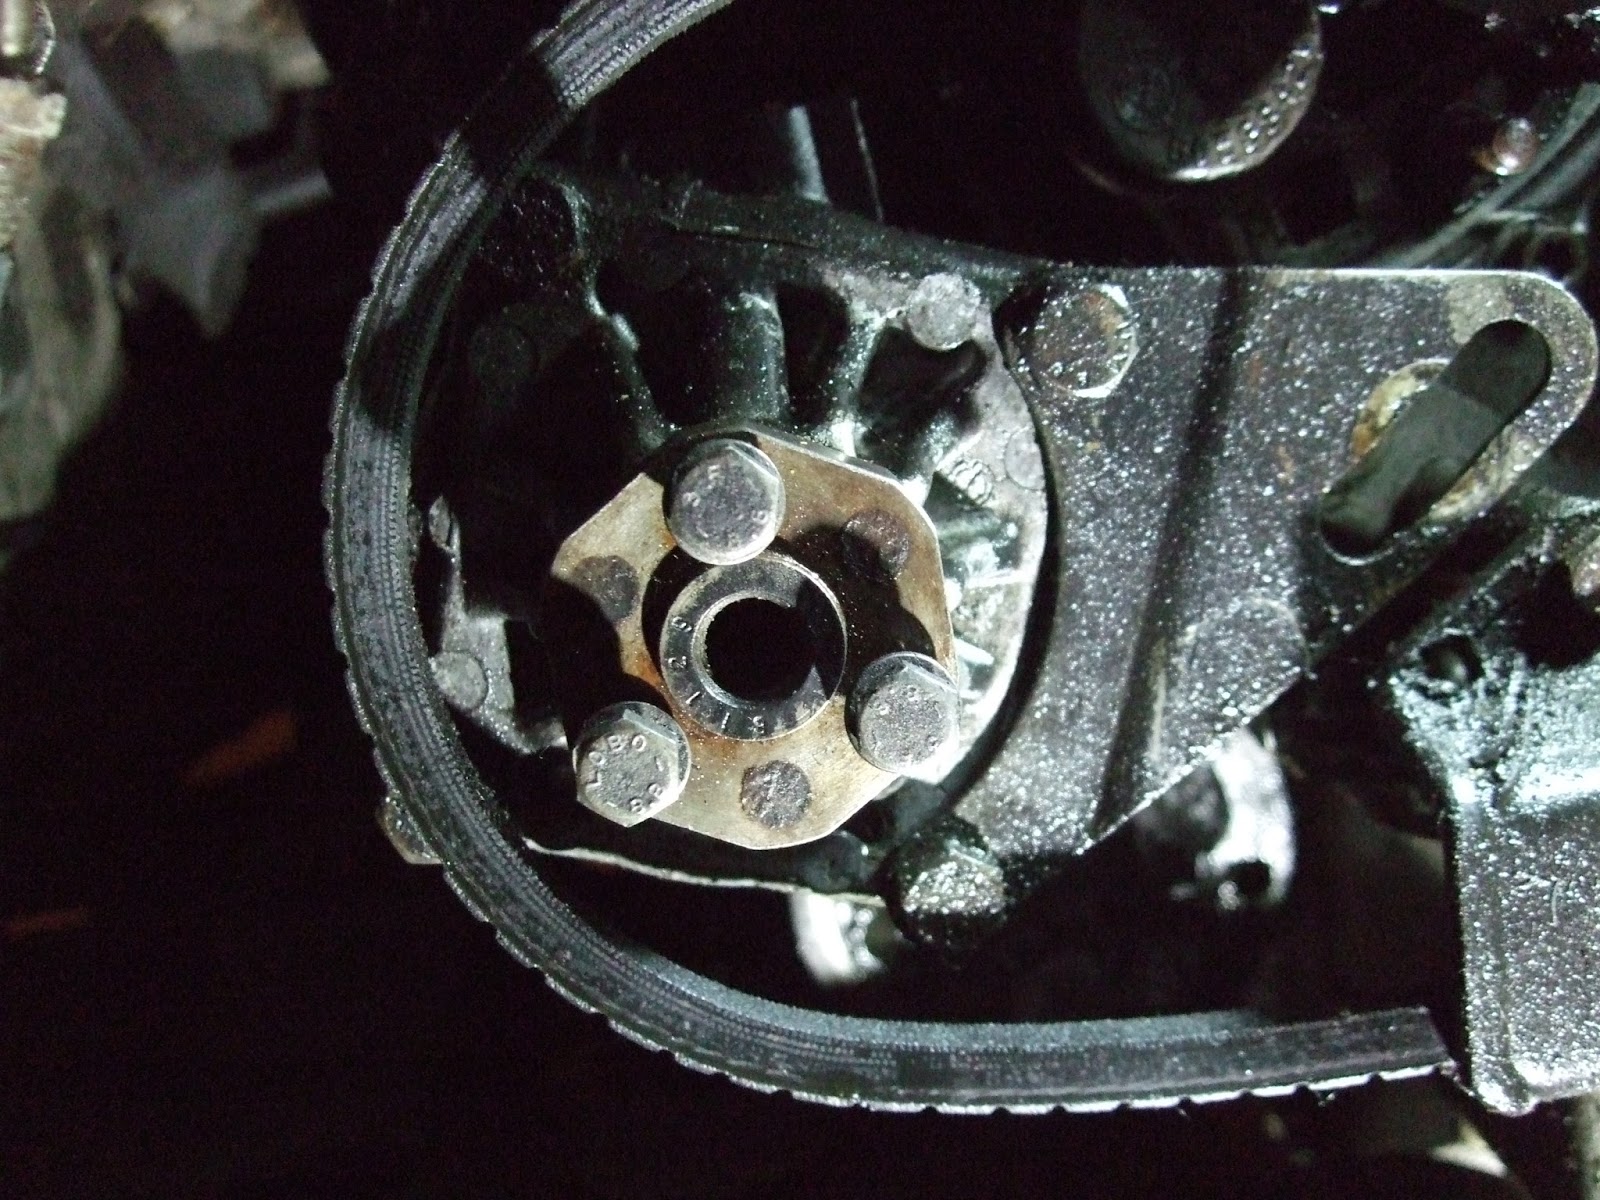
Well I found it more easy to undo the pulley bolts 10 mm head
                                                                                                            164.63


Allen key, bracket for tension adjustment bracket

                                                                                                                     164.64
Pulley of
                                                                                                                                             164.65

Bracket for servopump of , 13 mm and 17 mm , VERY tight space , Water metal hoses from waterpump close to it

                                                                                                                                 164.66

align with new pump , transfer brackets , bolts cleaned

164.67

Transfer hose connection 22 mm ringspanner , copper gasket too
                                                                                                                              164.68


           16 x 20 x 1,5 mm fits                                                                164.69


Clean brackets , bolts ,nuts put the bracket onto the new pump.
                                                                                                                                                164.70


                                                  164.71

Used torque 10 NM for the bolts its not specified in the work manual 164.72


Pulley on , 7 Nm
164.73
Screwdrivers holding bracket and pump in position , threads have been cleaned as usual Cal .22 gun copper brush.
                                                                                                                                                   164.74


                                                          Screwdrivers temporarly keeping bracket and pump in position.
                                                                                                                                                164.75                                                                  
New belt on , remove waterpump pulley , an impactdriver is essential the wedge is not enough
                                                164.76 Waith installing the last bolt til belt is on 164.77


Tighten the remaining bolts
                                                                                                                                                       164.78

Its time to relax.

Saltimbocca ala Romana , Latte Crudo and some excellent wine. Tremosine at the Lago di Garda


STEERING RACK BACK 
Here from drivers side                                                                                                                  164.79


 Push from left , pull from right passing brake booster                                   164.80

 THEN put the bracket under the steering rack
                                                                                                                                 164.81


Usual setup long socket , might need help pressing top of bracket dowm to allov bolts to reach into threads
                                                                                                                                  164.82
 Underside clamp onto subframe
                                                                                                                               164.83

Tourque the bolts AFTER all four are into place AND the connection to the steering
collum is centered         Torque 14 - 22 Nm 
                                                                                                                                                     164.84


Ingen kommentarer:

Send en kommentar