Driveshaft , yes the outer boots are always broken when all you wanted was to inspect the brake pads.
Grease all over the suspension.You probably do not know for how long it has been broken and therefor not hov the outer CV joint has been exposed to grinding dirt.
164.1
Count the teeth on the outer CV joint in cars with ABS there is an early 90 teeth version and a later 44 teeth version 1991 - 1992 is the year they changed that.
164.2
Inspect inner CV joint.Look for broken hex bolts.
164.3
There is always one. Rotate the shaft. Look at the one to the far left.
164.4
THAT ONE
Looking isnt enough use your hand. Its usally a lot worse than you thought
164.5
Order parts. here Outer CV joint ABS version ,pre 1992 version 90 Teeth
164.6
Bolts and tools , you need a long 8mm allen key to do this.
164.7
And boots too.
164.8
Plan C a new driveshaft . Ít was just too hard to resist buing it.
164.9
Decide to try out the new split boots that you glue or the slide over ones with a cone to make it possible.
Plan A is to take the entire suspension,brake and driveshaft out and work from the inner CV joint.
164.10
164.11
You will need a crowfoot or an open spanner , there is simply not space for anything else at the nut side , since they are of the locking type , fun begins,
8 mm Allen socket is mandatory too.
Left side car , under gearbox and subframe.
164.11
Closer 164.12
164.13
But of cource , the crow foot will eventually ruin a nut and you are stuck again aaaaaarrrrrrrgh !
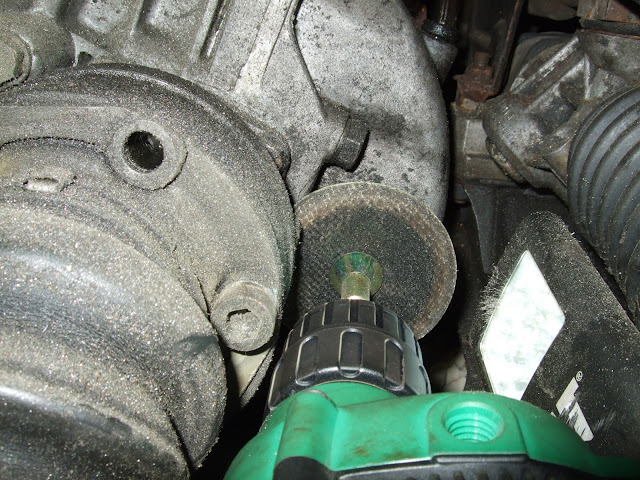
Buying special crow foot sockets did not solve the problem I think its time for some Dremel and another cutting disc. To the left new bolt with new small JIS nut and the old for comparison 164.14
This can solve the problem 3" disc for powerdrill. IT has to be that size or you will not have enough disc to cut the nuts on the rearside 164.15
VERY STEADY HANDS
164.16
When the nut is cut to the bolt , is a piece of cake to unscrew the bolt.
Thats where the cut is supposed to be 164.17
Finally
164.18
Detail inner halfshaft note it is not ruined by the disk.
164.19
Open steelband remove , dont stab yourself.
164.20
164.21
Cut and move
164.22
INNER CV JOINT
Gasket , has to be replaced too it usally comes with the boot kit, inner CV joint 164.23
Locking/retaining ring of. Inner CV joint pair of pliers and screwdriver and its of
164.24
Place in wise , be careful how or all the balls end on the floor , push only the outer ring to this level , balls half covered in the ring
Keep it like this and then pull of with your hands , mine did come of that easy.
164.25
OUTER CV JOINT
The key to get the outer CV joint of is this retaining ring ,Look for it where there is an asymmetrical notch, remove the grease , here for illustration the new one with the important retaining ring ENDS PAINTED RED
164.26
They are to be OPENED pressed apart longer distance, if you want this of in one piece.
OPEN retaining ring 164.27
Closed retaining ring in the groove 164.28
Back to the real world , the end of the retaining ring broke of , and that is not funny your second best friend the angle grinder and a metal cutting disc calls your name.DETAIL OF LOCK/RETAINING RING AFTER JOINT HAS BEEN CUT INTO PIECES
164.29
MERDE.
Yeah well retaining ring in tight spaces are wery efficient.
164.30
OUTER CV JOINT REASSEMBLY
Wipe your eyes and continue , clean the entire shaft. Grease. THIS IS THE SEQUENCE YOU CHOSE ALSO WITH THE OUTER CV JOINT ALREADY ON THE SHAFT THAT IS THE MOST COMMOM PROCEDURE WHEN CHANGING THE OUTER BOOT
Start with the outer CV joint 164.31
The groove has to be ready for the new retaining ring , that means cleaned and greased 164.32
Align and push outer CV joint on ,the retaining ring will open by itself , and eventually close too
164.33
A mallet would come in handy too
CLOSED IN THE GROOVE 164.34
Positioned like this in a wise and a dry cloth up and down the shaft.......then some lubricant
164.35
Its time to put some rubber on
164.36
Grease , a lot comes with the boot kit.
164.37
Boot on 164.38
something like that , remove excessive grease from the CV joint outer part 164.39
Push the flap in 164.41
 Tighten gently 164.42
In case you brought this type of outer CV joint , you should replace the dustring for the bearing Painted black here 164.43
Yes you guessed right its rusty thin as a can , be gentle Old outer CV joint 164.44
WD 40 all the way around it AND this is important working the surface thats REALLY stuck You might benefit from starting with that 164.45
Careful 164.46
Dry your eyes , these have to be very even
164.47
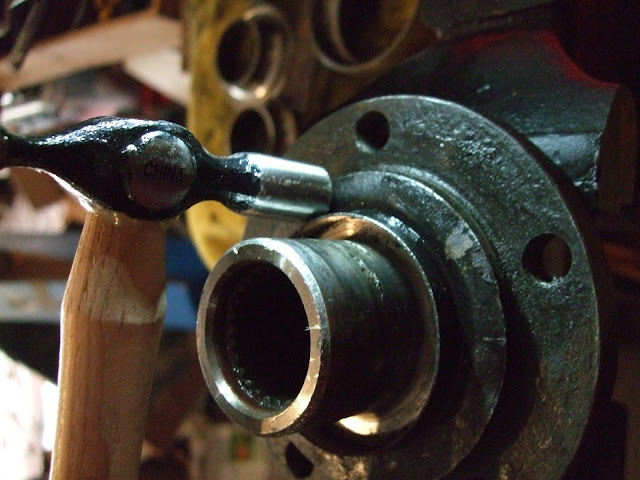
Do not ever dichharge shiny bits you never know when you need it again , here remains of hub and fronthub race and a tiny hammer.
164.48
Rearside of frontbearing dust protection on the outer race of the old bearing 164.49
Satisfied 164.50
Now put it on the outer CV joint. If you want to paint the driveshaft , sand , degrease,rust controller,primer,topcoat use a heatgun , it makes it so much easier to get an acceptable finish that lasts too , protect the grooves using masking tape.
164.51
The part from Drynda comes with that dust thing as a part of the design , and the ABS rin seems to be a spare part interchangebel with 44 type ABS sensors. The part from Drynda at the rear looks a lot sharper to me.
164.52
Inner CV joint boot on.
of the boot on some kits 164.53

164.54
Align boltholes using the bolts.
164.55
Try the parts on , grease on the shaft again , 164.56
Grease the CV joint top and bottom 164.57
Make shure the groove for the lock ring is free
165.58
Find a clean and proper size tool , here a used inner race for the front bearing , never discharge shiny bits , they may come in handy.
164.59
Transformation
164.60
Scource some bolts Quality 12.9
And finally you are ready to roll. 164.60
The car is still on stands , its time to get all of it sorted.
Hagia Sofia Istanbul.
William Lutken.


